Wednesday, April 22, 2009

Camera bag of holding?


If you caught the joke in the title you're a geek ;)
I figured it was time to upgrade camera bags today, its not that my old one was necessarily too small but I knew for some gigs I'd need more than it could handle. My old bag was a Lowepro Slingshot 200AW, a phenomenal camera bag by any standards and probably one of the most popular ever. Its been halfway around the world with me, seen the heights of the Great Wall, survived airports and security checks, and never broke my back. I've decided rather than sell it I'm going to keep it for times I need a decently spacious bag that is still fairly lightweight and feels good on my back.

Ok, onto the new bag, like a kid in a candy store I was awestruck and the sheer selection in Don's Photo today. I gotta hand it to the staff there, they are nice and patient, helping me critique each of the many bags I looked through. I finally decided to go with the Lowepro Fastpack 350 because it fit my criteria which were:

A larger bag that could accommodate everything my current bag could plus 2 flashes & accessories
Hold a laptop
Still be comfortable to wear

I was amazed at all the crap stuff I could fit into this bag. Here's a list of what I managed to fit inside:

Canon 40D w 17-85mm lens attached
Canon G10
70-300mm zoom lens
50mm 1.8 prime lens
Lens Hood
Lensbaby 2.0
Loreo Beamsplitter (Lens for 3D photography)
Macro extension tube kit
4 YongNuo PT-04 wireless transmitters and receivers
3 DIY gridspots
2 Stoffen Omnibounce (3rd party $2 versions, I'm not paying $30 for a piece of plastic)
580EXII inside its fabric case
430EXII inside its fabric case
Off camera TTL cord
2 BP-511A batteries & charger
Manuals for both the 40D and 580EXII
Cable release
4 CF cards
Card Reader
Laptop w power connections
Rosco Gels sample pack
Lenspen
Misc cables & adapters
Bag of homemade Bongo Ties
Plastic rain sleeve
1 Roll of electrical tape

All of that and some room to spare. Man I hope I never get mugged carrying all of this ;)

Had I been thinking I would have taken some pictures as I was doing this, now that its all done I really don't want to unpack everything and take shots. I will try to update this post sometime in the future with photos.

Even with all this stuff its pretty comfortable on the back, the straps are well padded and so is the part that rests against your back.

Are there things I'd change about it? Sure, nothing is perfect, however they are all very minor (who decided two memory card slots were enough?) and can be worked around. One feature the Slingshot that is missing in the Fastpack is the rain cover, though I've never used it I found it reassuring to know it was there. Also, for some reason the model down from mine has a cell phone holder on the left shoulder strap, why is this missing on the next model up.

All in all I have very few gripes about this bag, its my 4th Lowepro bag and like all the rest the quality is superb. I don't think people buy new ones because they break, its either because of new features or just to upgrade size.

For tons of user reviews on both my new and old bags Amazon.com has tons, you can check them out by clicking on these links:
Fastpack 350
Slingshot 200AW

Friday, April 17, 2009

DIY Ringflash for approx $20


I actually made this tutorial by taking stills from sketchup google's free 3d rendering program. Its very handy for designing projects like this, it lets you see how everything is going to fit together first. Hope you like it, I'll hopefully post some sample images soon.

Tuesday, April 14, 2009

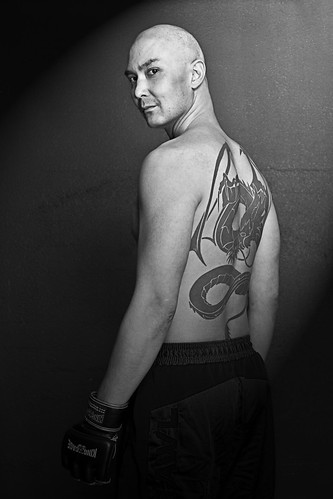
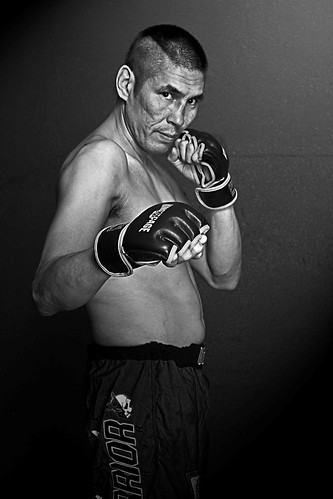
Blitzkrieg Shoot

So what do you do when a friend calls you up and says they need promo photos ASAP, you're working until midnight, and you don't have any gear with you? You say I'll meet you at 12:30am ;)

Luckily there wasn't really much pressure, they just needed 2 shots evenly lit at 300dpi so they could send them off to the event organizers for posters. I didn't even have to edit any of them.

Thank god I discovered the Strobist blog, if I hadn't I would not have had a portable rig to pull this off with let alone the lighting skills to setup, shoot, and tear down in 30min. After work I sped home and grabbed two light stands, my 580EXII and 430EXII, my "poverty wizards" and two shoot thru umbrellas. All stuff I could carry on my own and load into the car in one trip. Portability rocks!

My friend had mentioned the gym is in a basement but that it was really well lit. Never trust the client's ability to guage lighting conditions. It was plenty bright enough for training etc but not for photos if I wanted to shoot at a high enough fstop to get detail and low enough ISO for tight grain.

I new they wanted these for promo posters so I wanted to keep the fighters fairly evenly lit so that they could be removed from the background if need be. I decided to go with my new-found favorite lighting setup "the clamshell" configuration. With this setup you have two umbrellas stacked vertically and you shoot through the gap in between. It essentially makes it look like the person was standing infront of a 9'x3' softbox.

The shots they needed were pretty dull as far as lighting goes so after burning the disc off I decided I'd edit two quickly just for the fun of it.

Since fighting is a harsh and violent sport I decided to pump up the clarity slider in Lightroom, something I normally don't do (too many amatures are trying to fake the "Dave Hill look" that way) however I felt in this circumstance it would work.

Once I got them into photoshop I needed to do something more dramatic with the lighting. Awhile back I read an article about the light renderer in PS and how it could actually be useful. I finally tried it on a few photos and it actually works pretty decently. For these I set a spotlight up on the top right shining down diagonally across the photo.

At this point I pretty much had the shot where I wanted it but I thought I'd try for a little more of an edge. I duplicated the layer and added a high pass filter to it dialed in just to enhance some of the fine edges, then set the layer blend to overlay. Its important to desaturate the hipass filter layer too because it tends to greatly amplify colour noise.

Voila, 2 poster quality shots with minimal editing all from a shoot that was 30min from setup to tear down. I know I could have done much better given more time and a licence to edit but it wasn't what the customer wanted. These two shots were just a fun bonus I later emailed to him incase they could use them.


Fight Pics-11-Edit BW
Dave from "Way of the Dragon Martial Arts" based in Saskatoon

Fight Pics-27-Edit BW Crop
Elmer also from "Way of the Dragon Martial Arts" based in Saskatoon

Monday, April 13, 2009

DIY Ringflash - My Experience

Here is the version I made. Link to step-by-step instructions coming soon.


Ringflashes, they always produce such a cool look. With a lure of nice even wrap-around lighting beginners to "off camera lighting" are often disappointed to find out how much these can cost.

Enter the realm of the do-it-yourselfer, a quick google search will yield all sorts of ringlight contraptions. Recently two products have emerged to fill the niche for budget ringflashes, the Rayflash and the Orbis Ringflash, both seem to be derived from DIY projects. Both of these, like so many of the DIY versions rely on light from a Speedlight style flash, because of this they still aren't a genuine replacement for a real pro ringflash.

Last week I walked into the local photo store and saw that they had some Rayflash units in, I was immediately intrigued. After asking the salesperson to grab one for me I opened the box to see what all the fuss was about. There was no chorus of angelic voices, no warm soft glow emanating from the box lighting up my face, there was only a cheap feeling plastic ring. Now I'll admit the that it looks like it will do the job but really $300 CND? All it is is plastic, plastic that bends the light from your flash at 90° then channels it around your lens via lightpipes. Maybe I'm too critical, I just think this could be priced more reasonably at $100-$150 and this Ray guy would still be rich ;)

I haven't yet seen one of the Orbis Ringflash units up close and personal, from what I can gather its priced pretty close to the Rayflash. The Orbis design is more like the one I made, a ring with a hole at the bottom to shoot your flash into. It also appears to have some "trick" for bending the light around your lens. Regardless both are overpriced in my opinion but if you aren't much of a tinkerer or just don't have the time to try making your own they might be right for you.

Setting out to make a ringflash

I'm not going to go into full instruction mode in this post, instead I'll save that for my post on www.instructables.com and just update this post with a link to it.

Over the last 6 months or so I've been infected with Strobisitis a condition that afflicts photographers that accidentally stray to strobist.com and see the world of portable off-camera lighting. I went into a flurry of DIY mayhem putting together snoots and grids, bounce cards, and finally stumbling upon the beauty dish. The light from a beauty dish is similar to a ringflash but its still not "on axis" since you're not shooting through it. I did not know how big to make the beauty dish so I had made up 3 variations using different bowls I had picked up at the local $1 store. For months this former Halloween treat dish sat nicely painted just waiting to be used or tossed away. This was its chance.

Inspired by this guy's rig that was posted here at strobist.com I decided to make my own attempt. For my version I decided I wanted to use a diffuser on the front to try and even out the light a little more, I also wanted to include a bracket like this guy did.

I had the bowl, I had spray paint, I still had white nylon leftover from a semi-successful softbox attempt. I even had the aluminum stock from a previous project, now all that I needed to do was mash the stuff together.

For the center whole I ended up using a plastic peanut butter jar that I cut the ends off of. The fabric diffuser actually worked out without a hitch (had to bring it to my mother to sew though ;) and I managed to get the brackets bent properly on the first try.

Front and side view of the DIY ringflash. The bracket still had to be painted black.

Quick test shot of my nephew as he walked in the door.

I'll put up some real test shots later but this showed me that the light distribution was pretty even. The non-flash side is a little darker but there are a few things I've still yet to try to even it up. For around $20 of material I'm pretty happy with the results.

Friday, April 10, 2009

Fakin' It - Polaroid Transfers That Actually Look Real

Example using border created in this tutorial.
Parchment texture overlayed*
*
You can download the border template here

Some of you may or may not know what polaroid transfers are. Those that have done actual transfers may scream blasphemy!!! while those who haven't may rejoice in finding a decent tutorial on how to replicate the effect.

A polaroid transfer is made when the normal development process of the polaroid is interrupted and the image is instead placed on a different medium (normally paper). Normally heat and pressure is applied to encourage the image to bond to the new medium. This is all what I'm told, I've never had the pleasure of actually doing this, unfortunately Polaroid announced that they are no longer going to be making film so I may never get the chance. Lucky for me (and you) there are still ways to keep the look alive through the modern wonders of photoshop.

I was recently working on a shoot where the editing was leading me down a path that made the photo look a little "grungy" and I thought a polaroid border would suit it well. I knew at one time there was some nice soul who had posted up a psd template that was an actual scan of a blank polaroid transfer so I started looking. After 2hrs and many stock photo sites that were selling exactly what I was looking for I decided photographer/graphic designer/photoshop fiend would I be if I simply purchased this file. Luckily I stumbed across a post that mentioned using ink and some watercolour paper, thats all I needed to read and I was off to find the box with my drawing stuff.

This process is quite simple, there are probably a multitude of ways to do this and I encourage you to tailor this process to your own style.

Materials

  • 1 or more sheets of watercolour paper - others may work but watercolour paper has a nice texture
  • Ink of some sort. I used fountain pen ink but you could probably use all sorts of other stuff like food colouring or maybe even fabric dye just make sure it is dark. Get creative. It doesn't have to be black, we can fix that in photoshop.
  • 1 or more popsicle sticks - again other stuff could work, just get someting with a flat edge that you can use to transfer the ink.
  • Scanner - If you don't have one see if you can scan documents to file using the copier at work. If all else fails I don't think Office Depot or Staples charge that much for this service.
  • Image editing software that supports layers. Photoshop is preferred but GIMP (which is free) will work too. This tutorial however will be citing photoshop tools/commands only.
Making The Raw Border

Step 1
Prepare your work surface. Lay down some newspaper so you don't get ink on your table. It may also be a good idea to wear some old clothes just incase you splatter yourself.

Step 2
Prepare your palette. Just like an artist has a palette we need one too, something to put the ink onto. Use a separate piece of paper or an old margerine container lid, the margerine lid is better since it won't soak up the ink on you. Spread the ink out in a line on your makeshift palette.

Step 3
Run the edge of your popsicle stick lengthwise along the line of ink so that the whole edge is saturated.

Step 4
Place the ink onto your watercolour paper and gently rub it lengthwise back and forth while slowly pulling it towards you then slowly pushing it away from you. The idea is that as there is less ink it will start to leave voids and you'll get that "rough" look.

Step 5
Repeat for the remaining sides of your border. You may want to take another popsicle stick and break 1/3 of it off to use the remaining 2/3 section for the short sides of your border, this will give you a proper aspect ratio for your border. When I did it I wasn't that fussy, I knew I could correct the aspect ratio and more in photoshop. In the example below I didn't care that my "short sides" extended past the corners because I knew I would be erasing away the parts I didn't like.


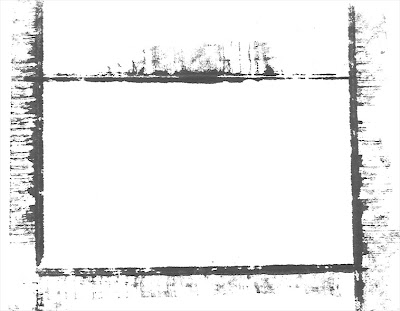
Raw scan of a border.


Post Processing

Step 1
Scan your raw border(s) at as high a dpi as you can, if you're taking the time to do this right you'll want quality borders that you can use with future cameras that may be higher resolutions.

Step 2
Open the scan in Photoshop. Perform any straigtening/rotating you may need to. If your ink wasn't black press shft-ctrl-U to turn it black and white, or you may want to see how it looks as is first.

Step 3
Cleaning up the image. Use the eraser tool and first select a large brush with a hard edge, then start erasing away the unwanted areas. You may want to try one of the brushes that looks like spraypaint, this will give you a more irregular shape.Border cleaned up using eraser tool

Step 4
Crop the image down to get rid of the excess white border (the border around our border ;)
How much you crop is up to you, maybe you only want the inner border left or maybe not. Its up to you.
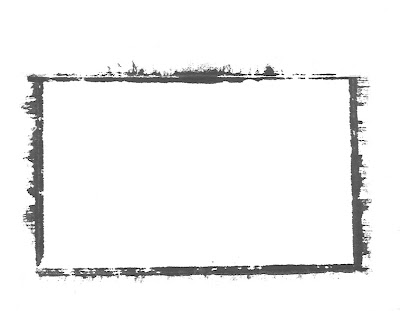
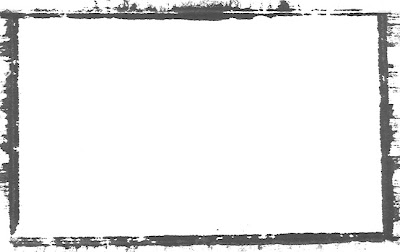
Border Cleaned & Cropped

Step 5
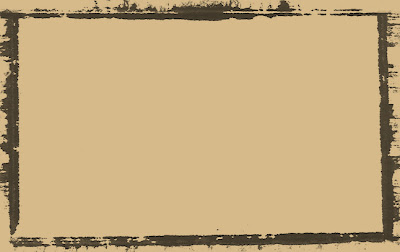
We now need to see how this is going to look. Duplicate your layer and name it "Polaroid Border Black". Set the blend mode to "Multiply". Then select your old background and delete the contents leaving a blank layer (click on background layer, then CTR-A, then delete). Now fill that layer in with a beige colour just so we can see how our blending will work.
You should now have something like this

Step 6
Some people might stop here and you're welcome to if you'd like however I want to add a little more realism to the border. If you're with me, click on the Polaroid Border Black Layer and duplicate it, name it Polaroid Border White.

Step 7
Invert the colors of the new border by holding Ctr then "i", now change the layer blending mode to "Screen". Don't worry it's going to look a little strange at this point.

Step 8
With the "white" layer still selected press Ctr-A to selecte the entire canvas, then under the edit menu at the top of the screen choose Transform>Rotate 180°

Step 9
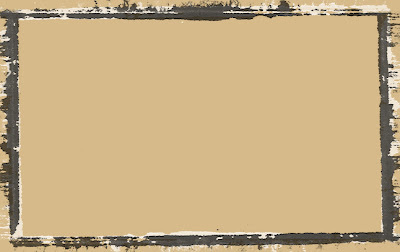
This looks better but the layer order is wrong. Drag the "Polaroid Border White" layer between the black border and the background layer.
This is what you should now have roughly

Step 10
At this point the border is pretty much finished, if you want you can erase away different sections of the layers to "tweak" it a little more and you can play with opacity. When I do this I like to have an actual image under the frame so I can see what to tweak. Once the adjustments are done save this as a PSD file so that you can always change the different layers if you want to.


Using The Border

Step 1
Open up an image that you want to apply the border to and note the dimensions. For this example I'm using the full resolution of my Canon 40D which is 3888x2592.

Step 2
Now we're going to try to match your border to the image size your camera takes, however we want to make it just a little bigger so that the border isn't encroaching on your photo too much.
Open your Polaroid transfer border and select Image Size front he Image menu at the top of the screen. Determining the right size is tricky and may take a few attempts, start with your the dimensions from step 1 then add an extra 10% to the width and about 6% to the height. Make sure you uncheck "Constrain Proportions" box. Paste your camera image into the border and make sure the border overlaps it but that the image doesn't extend past the border. If it doesn't just "undo" back to the re size and try again. For me a good number worked out to be roughly 4120x2860 which is where I got the 10% and 6% from. Once you have it right, delete the image layer leaving only the borders and the background, change the background colour back to white, and save it as a psd file.

Step 3
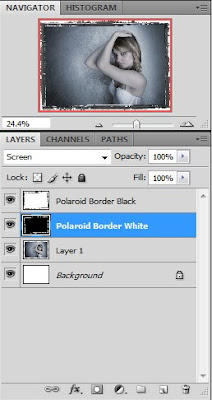
Now you're ready to use it with any photo however every time you use it you will have to paste your desired image into the Polaroid frame. Make sure when you paste the photo in that you move the layer so that it is just above the background layer.
Here "Layer 1" is the photo placed correctly in the layer orders.

Step 4
Once you have it lined up right choose the SAVE AS command to save so that you don't overwrite your template file.


Troubleshooting
There are 2 main things that can go wrong, both are easily fixed.

1) Your black border is too transparent even though the opacity is set to 100. If this happened its because your ink wasn't dark enough, to fix this select the black border layer and press Ctr-L to bring up the levels tool. Adjust the black slider to bring it up to a true black.

2) Your photo extends past your border but only in a few spots. Easy, just erase it away.

** The example at the top follows all the steps to the end with the added step of using additional layer containing stained parchment. This is a texture layer that was blended using multiply, opacity set to 50, and masked off to avoid contaminating the model's skin.