

It's been awhile since my last post, life's been busy what can I say. Over the holidays I picked myself up a 3D printer (Merry Christmas to ME!) and have been having a blast with it. I've always been a tinkerer, always doing DIY stuff and fabricating dodads and thingamagigs I needed here and there. Now that I have a 3D printer this has opened up a whole world of possibilities that I never would have imagined. After much research I settled on the Printrbot Simple Metal and I opted for the kit version that I had to assemble myself. The kit version is a bit cheaper ($539 USD at the time) but I didn't choose it purely for the discount, from what I read online it's great to build it yourself so that if or when it breaks you know how to fix it.
My latest creation is the "PLAyPin" which is a 3D printed medium format pinhole camera, the name is a bad pun I'll admit, the PLA is short for Poly Lactic Acid which is the type of plastic filament most 3D printers use. I wanted to design my own partly just because I can :) and partly because the other designs out there (notably the P6x6 and the TerraPin) require very long print times. That's not to say their designs weren't fantastic, I think they're incredible. For my design I wanted to use the least amount of plastic as I could and I wanted to keep the design modular so that I could print the camera in steps, the longest of which takes 3.5hours and that is for the main body of the camera.

I've shared my design on thingiverse which if you have a 3D printer you'll already know of, it is a site where people post their designs so that other people can download and print them. Depending on the creative commons license you can often remix the design by making improvements or customizations as you see fit.
The great thing about 3d printing is a fast cycle between concept and a physical object, once I had my first print in hand I was able to see some areas of improvement and quickly implement them. Each part on this camera was thought out and has a function.
One thingiverse user posted these great adapters for shooting 35mm film in 120 cameras so for my test roll I shot 35mm since it's a lot cheaper :)
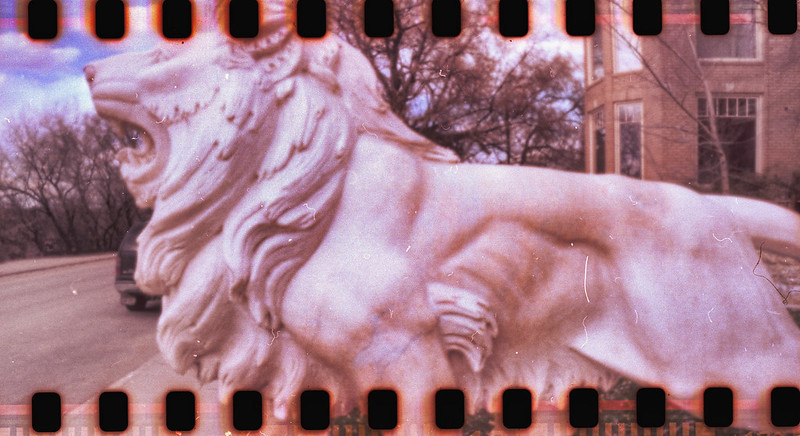
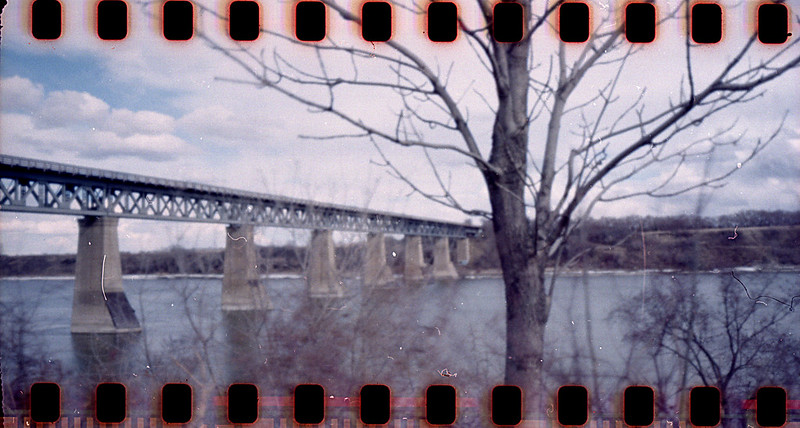
I scanned the roll using the Lomo Digitaliza which enabled my to preserve the sprocket holes. I was really happy with the results, probably some of my best pinhole shots to date as far as clarity goes. The pinhole I was using was actually a 300micron aperture for an electron scanning microscope, I purchased a bunch of these for $1 each from a guy on Flickr. The only tricky part is the apertures are in tiny copper discs that are only 3mm across so mounting them can be difficult. I should probably make a separate post at some point describing my process.
The PLAyPin is meant to shoot 120 film so it required a viewing window on the back to allow you to see the film numbers on the paper back. To accomplish this I picked up a sample pack of Lee filter gels and used the #26 red. While I did incorporate a nifty hinged window cover I still put black gaffers tape over the window when shooting 35mm just to be safe.
I have a few other photography related 3D printed items I've been working on and I'll try and post them soon.
Cheers