Showing posts with label DIY. Show all posts

Tuesday, August 12, 2014

World Pinhole Day 2014

Pinhole 2014 - Roll 2 - 10

Another year and another excuse to dig out or build a new pinhole camera. This year I was even able to combine it a little with my job. The company I work for, Bamboo Shoots, creates video content centered around people and events within my province for one of our regional cable providers. One of the stories was focused around invention and we were able to slip in a DIY segment showing how to build a Dippold camera like the one I made a few years ago.

This year I finally ordered some very precise diopters which are normally used in electron microscopy, unfortunately they didn't arrive in time so I wound up using the same camera from my last build. If I don't somehow manage to lose the tiny diopters I'll try and build a new camera before the fall, if so I'll post the pics. If not there is always world pinhole day 2015 :)

Pinhole 2014 - Roll 2 - 06

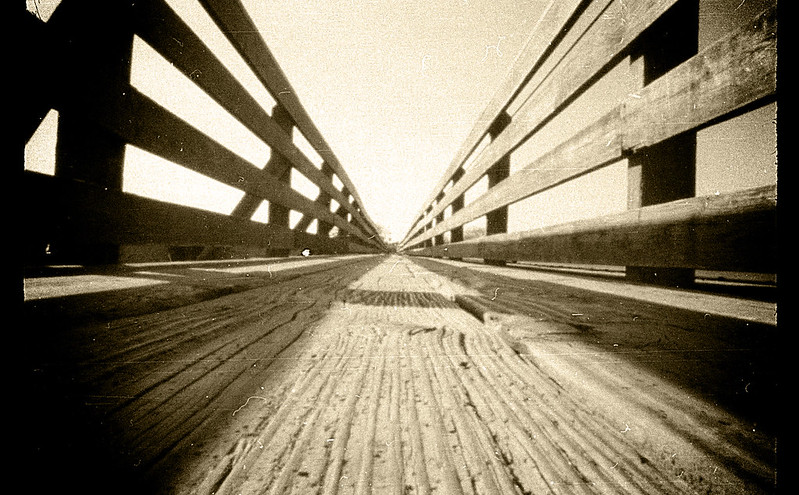
I was really quite pleased with the sharpness of the shots I was able to get this year, I'm hoping with the new diopters they are even sharper.

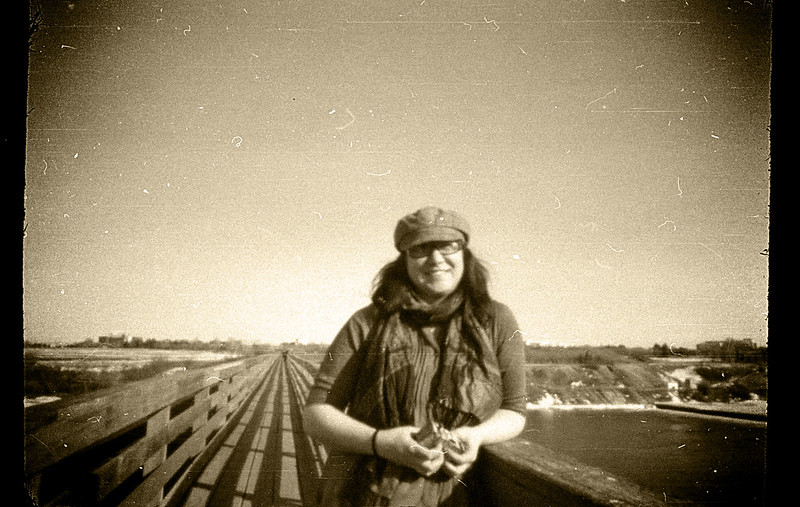
I even managed to pull off a portrait, something that you usually can't do very well with a pinhole camera.

Pinhole 2014 - Roll 2 - 07

The borders that the camera produces were pretty cool too and it almost seems like in some there were some minimal light leaks.

Pinhole 2014 - Roll 2 - 08

My interest in film was sparked again, that anticipation of having to actually wait to see the photos instead of the instant gratification we're becoming so used to. I started digging out my old cameras and even acquired some new ones, more to film related posts to follow...

Tuesday, August 21, 2012

Old school pinhole fun


My customized Dippold pinhole camera

Earlier this year I promised myself I would not let yet another worldwide pinhole day (Apr 29 2012) pass me by. I was on track and managed to get two Dippold pinhole cameras made, however life managed to get in the way yet again and it wasn't until my summer holidays that I was able to take them out for some homemade fun.

Lets back up a little, years ago I had made the Dirkon which is another paper camera and it was really fun to put together. I can't remember why but I didn't have the best luck with it image wise, if I remember correctly the photos came out really blurry. I'm sure that was my fault in either user error or a construction error so don't write off the Dirkon prematurely. My Dirkon still resides in my display case because I did put a lot of time into building it. Given my prior issues and the desire to try something new I thought I'd try the Dippold version instead, it was quite easy to make and I even took it one step further by designing my own "skin" which will hopefully soon be available here or here (its the Pinstamatic skin).
Update: For the time being I'm hosting the skin on my dropbox account, grab yours here. Note: It was hard to fit it all on one sheet so some of the tabs to wrap around and glue are a bit small, the extra "leather" is provided so you can extend the tabs if needed.

One of the most crucial aspects to any pinhole camera is the pinhole itself. I made my own from brass shim stock and a pin. You'll need a very sharp pin and some fine grit sandpaper, 400 or higher should do. For my pin I used a long and narrow bulletin board pushpin (not the short fat style). There are various techniques online but here is what I found worked best for creating very tiny pinholes (I managed to get as small as a 0.14mm pinhole). The trick is you don't actually push all the way through, you press gently and essentially only form a tiny sharp little dent. Then you flip it over and sand the little bump away, flip it over and repeat until you finally break through.This method may be a bit tedious but its the only way I've found to get a very small hole that is very round and free of burrs.

Another solution for those less inclined to DIY is to purchase electron microscope aperture grids which are extremely precise and come in a variety of sizes (listed in microns). Here's a site that stocks them (you'll want the single hole version) but they come in a pack of 100 for ~$26. The Dippold design needs 200 micron apertures and the Dirkon needs 300 micron. Get a few friends and split an order and have enough to last you a lifetime :) I've yet to try these so if anyone does let me know in the comments section and post a link to your pics!

Measuring pinholes that are down to 0.2mm is a bit tricky. Luckily you can get a decent enough measurement by photographing your pinhole beside a ruler using any decent point & shoot camera in macro mode. Once you have the image, crop from the center of each of the mm markings on either side of your pinhole. Next use the measurement tool in either Photoshop or GIMP to determine how many pixels between mm markings and how many pixels across your pinhole is, divide the pinhole width in pixels by the overall width and there is your size in mm.


This pinhole worked out to about 0.32mm

As I wrote the above I realized that I had made a mistake with my pinhole size, initially I planned on making the Dirkon which required a 0.3mm pinhole so that's the size I made them. Later, due to time constraints, I opted to make the Dippold instead which is a lot simpler in its construction but needed 0.2mm pinholes. I'm not sure how much of a difference this made in the final image quality but I might have been able to get a bit sharper images had I used 0.2mm pinholes.
90670005
A pinhole image of the crooked trees near Hafford Saskatchewan (~3-4 second exposure, ISO400).

Enough about construction, more about the actual shoot...

With the last weekend of my holidays approaching I realized if I didn't squeeze a photoshoot in soon I wasn't going to get a chance. My last post was about newly IR converted Canon 10D from lifepixel.com,  aside from a quick "does this really work" shoot I hadn't had time to play with it. I texted a friend quickly to see if she was down for a road trip later in the week and the plans were laid. Initially when I'd made the two pinhole cameras for world pinhole day the second one was intended for her but both of our lives quickly became insanely busy so the sat unused.

90670003 colour corrected
My SK roadtrip buddy :)

One addition I'd made to the Dippold was to glue a 1/4 nut onto the bottom for attaching a tripod. My fellow pinholer however decided she wanted to use trees or the ground to brace her shots so we removed her mount. Without the tripod her results were a little more abstract but that's what pinhole is all about. For most people pinhole is about having fun and being artistic, not tack-sharp images and precision (unless by chance you have one of these).

A shot of me setting up for the first image in this post. Photo by Jackie Kripki

The trip was really fun, met some cool people and saw some interesting stuff along the way. My next post will have more pics from these sweet surreal locations and in infrared!



Wednesday, February 22, 2012

Poor man's macro really delivers

IMG_8563
Closeup of a new Canadian $100 - Razor thin DOF at f5.6
Click the above photo to see all of my macro shots

The other day I spied a Kijiji ad (like Craigslist) for a Canon EOS3000 film SLR with an EF 35-80mm lens & polarizing filter all for $20! It also just so happened that the seller lived across the street from my parent's house, how random is that? I figured I'd snap it up just for the lens if nothing else so I googled the 35-80 to see if it was any good or not. One thread I found said the lens was a mediocre kit lens, even the newer 18-55mm kit lenses were better, however the person went on to say that with a little hacking the lens could be made into a pretty decent macro lens. After seeing some of the photos other people were taking with the modified 35-80 I was totally sold. When I went to pick up the camera and lens the guy said he thought $20 was too much and gave me $5 back! I told him $20 was fine but he insisted so my already sweet deal got even sweeter.

Here is the original forum thread I found on the topic but if you just google "35-80mm lens hack" there are plenty of results and tutorials. There are 3 versions of the EF35-80mm, it sounds like version 1 is the easiest but I found modifying my version 3 model was pretty easy too. Now there are three ways you can go about doing this, the first and simplest way is to just remove the front lens grouping which are all housed together and use the lens that way. The second way is to punch out the 3 lenses that make up the front element so that you can put the plastic back on, this allows you to use a filter to keep dust out of the lens. The 3rd way is to remove only the first and third lenses from the front element, this reduces magnification by a little but allows you the ability to focus using the focusing ring. The 3rd way is the most difficult, especially on the version 3 lens that I have, however for some this might be the best opotion since it increases focal distance a few inches. At this point I'm thinking if I can find another 35-80mm for $15-20 I'll just have one with the front middle element and one without. Having the middle element with the lower magnification will be better for shooting flowers etc.

Once I got home from work yesterday I spent 2 hours shooting anything I could find in my house that I thought might look cool at this magnification :) While I took a break from the shoot and had a smoke out front of my house I even gathered up some small pine branches, pine cones, and a few dead leaves to shoot. I just used a sheet of white paper as a backdrop, my 580EXII with a noname Stoffen on it (triggered wirelessly) provided my lighting. For most shots I was able to keep the power down at 1/128 but it all depended, for a few shots I was up at half power and was bouncing the light off of my ceiling.


IMG_8777
A dead leaf proved a worthy subject when dramatic top lighting was applied.


IMG_8782
Same leaf but backlit with an LED flashlight


IMG_8720
Pine needle tips just poking into focus

IMG_8588
The inner portion of an orange slice looks like a flavour explosion at this magnification.

For some reason at times I'd wind up with a light spot in the center of the frame, it seemed to happen most if I was shooting a brighter scene. At first I thought maybe I'd gotten some dust on one of the elements since I was shooting with the front piece off. Cleaning didn't seem to help so I'm starting to think that this is due to the lack of "flocking" due to the missing front piece, the flocking prevents unwanted reflections. The only other explanation is that one of the elements has a small scratch or something on it that I simply wasn't seeing with my naked eye. In the photo below you can sort of see what I'm talking about, I had shots that were way worse but I didn't post them anywhere so this is the best I can do to show you.

IMG_8672
In some photos I'd get a lighter spot in the center of the frame, not completely sure of the cause. The subject btw is a weaved cowboy hat my roommate recently bought while in Cuba :)

This proved to be probably the best $15 I've ever spent. Since its winter and there aren't a lot of flowers around to shoot I might actually hit up the flower shop and buy something to shoot, if I do they'll windup in my macro set on flickr so feel free to check back.

Sunday, March 21, 2010

Abandoning PC Sync for 1/8" stereo jacks


After reading David Hobby's recent post regarding his dislike for the antiquated PC Sync socket I sat laughing and saying to myself I couldn't agree more. This poorly designed connector has been around since the 1930's, it doesn't lock in place, and they wear out quickly. If you're unfortunate enough to break one or wear it out to the point it is unusable its next to impossible to find a replacement socket. I've worked in the electronics field for nearly a decade now and pride myself on being able to source obscure parts yet I still can't find a decent source for these.

Anywho as Mr.Strobist himself said its time for the PC Jack To DIE!

I recently picked up some new (to me anyway) White Lightning studio strobes which came with some rather well used cords, one of which was completely ready for retirement. I decided to just make some new cords but thought I'd improve the design. The existing cord was a 1/4" mono jack to a PC sync jack, I opted to make a new set but replace the PC sync end with a readily available 1/8" stereo jack instead.

In for a penny, in for a pound I decided to convert most of the rest of my equipment to 1/8" as well. When you're out shooting a gig the last thing you want is unreliable equipment and to me anything that is connected via PC sync cables is unreliable.

First up is my PT04-TM "poverty wizard" wireless triggers. These were nice and easy to mod because there is quite a lot of room inside. I didn't have any 1/8" sockets lying around but I did happen to have some stereo "Y" adapters that I could part with so I hacked them up.

If you're going to attempt something similar I'd advise you make note of the polarity, some devices work fine either way but I know my triggers are polarity sensitive. Inside the PT04-TM receiver the wire going to the center pin of the hotshoe is positive the the one going to the collar is negative. On the 1/8" jacks the tip is positive and the sleeve is negative. In my case I used stereo jacks because that is all I had lying around so I just tied the ring and sleeve together to make it mono. The photo at the top of the article shows the almost finished product, later I added epoxy where the wire entered the case of the receiver. This ensured the wire couldn't accidentally get yanked out and tear a bunch of the wiring.

Closeup of 1/8" socket mod of the PT04-TM receiver

Here is a zoomed in photo of the internal wiring, these particular PT04-TM receivers already had a PC Sync mod done to them when I got them. The heat shrink on the cables wasn't crucial but its better to play it safe when possible.

Next up was my hotshoe-to-pc sync adapter (shown in top picture), for this one I rummaged around until I found an old Sony Walkman I had lying around and gutted it for the 1/8" headphone socket. Normally I would have just went to one of the local electronic supply companies but it was the weekend and I couldn't bring myself to pay 5 times as much at Radioshack. Luckily the adapter was one of the larger ones so there was ample room inside to fit the socket, unfortunately I didn't take a photo of the internals. The process is the same anyway, center pin is positive and collar is negative.

Two Seagul SYK-3's modded with bypass switches and 1/8" sockets

The final gear to mod were two optical slaves I had purchased here for dirt cheap, when I picked them up I had this mod in mind since they're the cheapest hotshoe housing I could find ($5.55) with the added bonus of being optical slaves. The only issue is that I needed to add a switch to turn off or on the optical slave part. I could have just placed a piece of electrical tape over the sensor eye to disable it however I needed to electrically disconnect the slave circuit if I wanted to use this on my 580EXII. For some reason the 580EXII doesn't like cheap optical slaves and will only fire once, the flash then has to be turned off and on again before it will fire again.

I've finally cast off the shackles of the PC sync socket, all that lay before me is reliability and reasonably priced cables ;)

On a side note I picked up some sweet cases from Don's Photo in Saskatoon, these were in the bargain bin for around $10. They come with customizable foam and are rock solid little cases. I was tired of my triggers getting banged around in my bag so I thought I'd protect them a little.


My PT04-TM's and a few odds & ends housed in a Vanguard Swing 8 hard case.

Hopefully if we shout loud enough about how much the PC sync connector sucks the manufacturers will finally start to include 1/8" sockets in their products. Heck even a mini 2.5mm socket like most cell phones have would be fine, as long as its a connector that is abundantly available. Now if only everything would start using mini-usb connections for charging ports...

Friday, April 17, 2009

DIY Ringflash for approx $20


I actually made this tutorial by taking stills from sketchup google's free 3d rendering program. Its very handy for designing projects like this, it lets you see how everything is going to fit together first. Hope you like it, I'll hopefully post some sample images soon.

Monday, April 13, 2009

DIY Ringflash - My Experience

Here is the version I made. Link to step-by-step instructions coming soon.


Ringflashes, they always produce such a cool look. With a lure of nice even wrap-around lighting beginners to "off camera lighting" are often disappointed to find out how much these can cost.

Enter the realm of the do-it-yourselfer, a quick google search will yield all sorts of ringlight contraptions. Recently two products have emerged to fill the niche for budget ringflashes, the Rayflash and the Orbis Ringflash, both seem to be derived from DIY projects. Both of these, like so many of the DIY versions rely on light from a Speedlight style flash, because of this they still aren't a genuine replacement for a real pro ringflash.

Last week I walked into the local photo store and saw that they had some Rayflash units in, I was immediately intrigued. After asking the salesperson to grab one for me I opened the box to see what all the fuss was about. There was no chorus of angelic voices, no warm soft glow emanating from the box lighting up my face, there was only a cheap feeling plastic ring. Now I'll admit the that it looks like it will do the job but really $300 CND? All it is is plastic, plastic that bends the light from your flash at 90° then channels it around your lens via lightpipes. Maybe I'm too critical, I just think this could be priced more reasonably at $100-$150 and this Ray guy would still be rich ;)

I haven't yet seen one of the Orbis Ringflash units up close and personal, from what I can gather its priced pretty close to the Rayflash. The Orbis design is more like the one I made, a ring with a hole at the bottom to shoot your flash into. It also appears to have some "trick" for bending the light around your lens. Regardless both are overpriced in my opinion but if you aren't much of a tinkerer or just don't have the time to try making your own they might be right for you.

Setting out to make a ringflash

I'm not going to go into full instruction mode in this post, instead I'll save that for my post on www.instructables.com and just update this post with a link to it.

Over the last 6 months or so I've been infected with Strobisitis a condition that afflicts photographers that accidentally stray to strobist.com and see the world of portable off-camera lighting. I went into a flurry of DIY mayhem putting together snoots and grids, bounce cards, and finally stumbling upon the beauty dish. The light from a beauty dish is similar to a ringflash but its still not "on axis" since you're not shooting through it. I did not know how big to make the beauty dish so I had made up 3 variations using different bowls I had picked up at the local $1 store. For months this former Halloween treat dish sat nicely painted just waiting to be used or tossed away. This was its chance.

Inspired by this guy's rig that was posted here at strobist.com I decided to make my own attempt. For my version I decided I wanted to use a diffuser on the front to try and even out the light a little more, I also wanted to include a bracket like this guy did.

I had the bowl, I had spray paint, I still had white nylon leftover from a semi-successful softbox attempt. I even had the aluminum stock from a previous project, now all that I needed to do was mash the stuff together.

For the center whole I ended up using a plastic peanut butter jar that I cut the ends off of. The fabric diffuser actually worked out without a hitch (had to bring it to my mother to sew though ;) and I managed to get the brackets bent properly on the first try.

Front and side view of the DIY ringflash. The bracket still had to be painted black.

Quick test shot of my nephew as he walked in the door.

I'll put up some real test shots later but this showed me that the light distribution was pretty even. The non-flash side is a little darker but there are a few things I've still yet to try to even it up. For around $20 of material I'm pretty happy with the results.

Monday, October 20, 2008

DIY Twin Diffuser for flash


We're going to see how well posting a DIY works. Here is a quick and easy project that you can probably make for free since you'll have most of this stuff lying around. There is a commercially available version of this that I won't mention here, this device is so simple I couldn't justify the fifty bucks they wanted for it.


What you'll need:

1 Rubber band or a piece of fabric elastic
1 Regular sized paperclip
1 7½" Piece of semi hard steel rod or flat band
1 piece of white plastic (margarine container lid) or cardstock
Hot glue gun
Needle-nose pliers
Scissors
15 min of time

Step 1:
Bend the 7½" steel rod at 90° 2½" up, then bend another 90° 1½" down from that. You should end up with something that resembles what you see in the top left of the photo above.

Step 2:
Using the scissors cut two pieces out of the white plastic at 2"x2" and two pieces at 1" by 2"

Step 3:
Cut two 2½" pieces from the elastic and using the hot glue gun attach them to the two 1" by 2" strips of plastic.

Step 4:
Straighten out your paperclip and loop it once around the top portion of the steel piece you bent earlier. See finished image below for a better idea.

Step 5:
Glue the metal legs to the sides of the plastic 1"by 2" pieces. Make sure you glue this to the opposite side we glued the elastic band to, this way the metal doesn't rub against our flash and scratch it.

Step 6:
The last step is to glue the two reflectors to the paperclips, contrary to the image below I fount it worked better to bend the two ends of the paperclip back into a bit of a "U" shape. This distributes the pressure a little better and makes the gluing easier.

Hopefully the instructions were easy to follow, I plan on adding more step by step pictures later. This was sort of a test post.