Showing posts with label how to. Show all posts

Monday, January 3, 2011

Advice on finding a wedding photographer

Wedding revamped 2

First let me start off by saying I'm not trying to pitch myself ;) In fact I haven't been shooting weddings for a few years now and won't be until I have my basement studio finished (if even then). However, I'm often approached by people asking if I'll shoot their wedding and always feel the need to write up a long email referring them to other photographers as well as give them tips on what to look for. I realized today that I've probably written over 50 emails like this so I finally decided to just make a blog post about it so in future I can just link them to it ;)

There are tons of photographers to choose from.
With the price of digital SLR cameras these days everyone seems to be getting into the biz, this is both good and bad for you. A fancy camera does not a photographer make ;) There are a lot of up and comers that are undercutting established photographers, a few are amazing and are a steal of a deal where others simply shouldn't be working. On the flip side some of the "established" photographers out there are really quite terrible. So what do you do?

First off ask your friends/family that have recently been married who shot their wedding and ask to see their wedding photos. Word of mouth and testimonials from people you know carry way more weight than a fancy website and/or ad campaign. Remember, a photographer's portfolio is their best work and not always typical of what you're going to get so trust what you see in your friends album over the portfolio.

Here are some questions to ask yourself as well as the prospective photographer:

  • How many years have they been shooting weddings/how many wedding have they shot? An experienced photographer that has shot a lot of weddings will probably cost more but it might be worth it because they'll know how to handle any situation that comes up. On the flip side a newer photographer, other than being cheaper, might be more in-tune with newer styles and may not take shots that seem as "old fashioned".
  • Engagement Photos. Often packages will include engagement photos and as I photographer I always preferred to do both the engagement photos and wedding photos. This gives the bride and groom a chance to work with the photographer and build a rapport with each other so that when the big day comes everyone is comfortable with each other. From purely a customer stand point my take is that the only reason for engagement photos is to have a nice photo for the wedding invitation, the rest of the photos are forgotten after the wedding. If the package includes it then great, if it costs more then its up to you to decide if you really want/need them.
  • What if it rains? Amazingly even some of the high end photographers don't do a proper job if it rains. Rain means shooting inside, preferably with the proper lighting equipment and skills to use it. This is where most photographers either lack studio experience, proper gear, or studio space to do it properly. Note that this is why I've decided not to take on any weddings for now, I simply lack the studio space to accommodate a wedding party. Ask the photographer what the backup plan is in the event of inclement weather. If they have a studio available to them with proper equipment ask them to see examples of the shots, if they've been shooting weddings for any length of time they will have certainly been rained out at least once.
  • Backup equipment. One thing that almost nobody asks the photographer is whether or not they have backup equipment. It's not unheard of for a camera to suddenly fail during a wedding shoot (a photographer's worst nightmare ;) but this again is where a seasoned pro will be covered and a newer photographer may not.
  • All day, just ceremony & formals, or by the hour? Most photographers will offer at least 2 of the 3 if not all of them. Which one you should choose is really up to you. You'll want to cover the ceremony and formals as a minimum and that is often much cheaper than all day coverage. Are the "getting ready" shots worth the extra price? Same goes with the dance, if you're cool with just "documenting" these extras then skip the all day coverage and collect pictures from your friend's digital cameras.
  • What is a second shooter and should I pick a package that has one? A second shooter is a second photographer that helps ensure the main photographer doesn't miss a moment, also by having one you'll get photos from multiple angles which can yield better coverage during say the ceremony. Generally only the higher end packages offer a second shooter and depending on the photographer/package they might only be there to help cover the ceremony.
  • Full resolution files on disc or ordering through the photographer? Nowadays with the digital revolution more and more photographers are just giving the files to the client on a disc and letting them make as many copies as they want. It's worth it to pay a little more for this feature as ordering through the photographer is generally expensive and some of the prices I've seen for enlargements are downright un-ethical. If you do get a disc though I highly recommend making a few extra copies as backups and keep one at a friend/relatives place as an off-site backup.
  • Photo editing, wedding album, hosted gallery etc. One thing you need to ask, especially with cheaper packages or inexperienced photographers, is whether or not the photos are edited and to what level are they edited. Is it just basic exposure & colour correction or does it include blemish removal etc. As for the other extras you might want to save the $$$ and do it yourself. I recommend www.blurb.com to all of my friends for photobooks, they are really economical and offer a very professional method for displaying your photos. Hosted galleries are almost pointless nowadays since you can do it yourself on facebook or flickr. One more thing about the photo editing, if possible see if they photographer will even be willing to throw in the original or "RAW" files, this way if the person doesn't do a good job editing the photos you'll still have the originals which could be edited properly at a later date.
  • Wedding Insurance, say what? Chances are you probably didn't even know this existed, don't worry because most photographers don't either. It's actually ingenious really and I'm surprised more people don't get it. Some photographers offer it but I believe the bride/groom can purchase it on their own as well. If you're planning a big/expensive wedding I recommend giving it some thought. Here is just an example of some of the things that can be covered: Personal Liability, postponement/cancellation, wedding photographs, wedding gifts, loss of deposits, wedding gown & attire, wedding jewelery.
  • Location location location.Where are you planning to get your photos taken? A few quick things to remember when choosing a location is that public places (parks etc) generally can't be booked for private gatherings and during peak wedding season may be inundated with other wedding parties. Here in Saskatoon a popular place is the Boffin's Club gardens, what most people don't realize is that you can't actually book this place. You can call them and they'll put your name down but they'll do the same for the next photographer that calls too, if you're lucky they'll let you know how many other weddings are marked down for that day. In short, try to have a backup plan and discuss this before hand with your photographer.
  • Agreement of service expected. To be honest I'm not actually sure if this is common or not but I think it should be if it isn't. Basically before you hand over any deposits write out in point form what the package includes AND what the photographer's liability is if for some unforeseen reason they are unable to deliver (gets into an accident on the way to the wedding etc). Essentially this is a contract for services, if they are asking for a deposit to ensure you don't bail on them its only fair that you have some assurances as well.
Well hopefully that covers just about everything, if I think of anything else I'll update this post.

Cheers,
James

Tuesday, April 27, 2010

Ok I bought a dSLR now what?

OK

I bought a digital SLR camera. . .

now what?

A few people have approached me lately with essentially the same question, some were asking about what kind of lenses they should buy others about what kind of software they should use. Thinking that these were probably fairly common questions I decided to write up a little guide outlining a few things you should consider. They are arranged roughly in the order you should consider them too ;)


What attachments/accessories/lenses should I buy?

This all depends on what you plan to do and your budget but here are a few suggestions:

UV Filter

Chances are good that if you bought your camera at any respectable shop they would have tried to sell you one of these right away. No it's not a con by the sales associates (mostly) the idea is that it if something is going to get scratched it'll be a $30 filter instead of a costly lens. If you're just starting out in photography you probably won't need a top of the line brand filter so don't let the sales person get carried away trying to upsell you there.

*Tip: One interesting quirk to watch out for is what you see in the image above. It happens if you're using filters when taking long exposures at night of northern lights. I won't get into the physics of it but it has to do with a certain wavelength of light and the two parallel faces of your lens and the filter.

Lenspen

I think that all photographers should have one of these in their bag. At around $10 you'd be crazy not to have one anyway. One one end is a retractable brush that is good for knocking loose dust and debris and on the other side protected by a cap is a slightly concave felt pad for getting more stubborn materials off your glass. Over time (and depending on usage) they should probably be replaced so you have a new felt tip, that being said I've had mine for years and see no need to change it yet.

  • Tip: They also make lenspens for point and shoot cameras, they have a smaller triangular felt pad for cleaning the smaller lenses.

Carrying bag/Camera Backpack

You just dropped a lot of money on your new camera so you should spend a little cash in order to protect it. There is a plethora of options in this department, unfortunately once you're getting into dSLR size bags the price goes up because there is less demand for them.

Above are some choices from LowePro, a company that's been around for decades and is well respected among photographers. There are a variety of choices ranging from simple hip pouches to sling bags and full backpacks which even accommodate laptops.


*Tip: One word of advice is buy a slightly bigger one than you need so that if you pick up a few lenses later on you can still carry them.


Tripod/Monopod

Investing in a decent tripod would probably be next on the list for most people.

Why do I need a tripod? There are a number of reasons but mostly it allows you the luxury of shooting at slower shutter speeds without producing blurry pictures. If you read my guide on understanding lighting you'll already know that you always want to keep your ISO as low as possible (sensitivity to light) in order to get the sharpest photos, however if your available light is already quite low the only options are to increase your aperture and/or lower your shutter speed.


If you're wanting to do any of the following photography you'll need a tripod:
Landscapes, wildlife, macro, sports, lowlight/night photography (lightning, northern lights) and anytime you're using a telephoto zoom lens

The rule of thumb is that 1/60th of a second is the slowest shutter speed you can safely shoot handheld (though this is changing as image stabilization technology improves) but with a tripod you can have exposures lasting as long as minutes or even hours. As I mentioned above any time you're using a zoom lens you should be using a tripod, the reason is when you're zoomed in that far any small movement gets multiplied by your magnification X.

Good brands for tripods are Manfrotto, Slik, Gitzo, Velbon to name a few. Avoid tripod's designed for video cameras, they tend to be sloppier. When you're looking for a tripod you want one that is sturdy and won't allow your camera to move when all the adjustments are tightened up.

Tip: A monopod may be what you're after as well, they are good for sports photography because they don't take up much space . Keep in mind though that you can always use your tripod as a monopod simply by not splaying the legs out. I'd recommend starting with a good tripod and if you think you need a monopod later then go for it.

Extra lenses:

In short the best two lenses you can add to your kit are a zoom that compliments your kit lens and a nice fixed prime lens.

Zoom lenses:

Most dSLR's come with a general purpose standard lens, typically around 18-55mm. For most situations this is the best lens to use however sometimes you need a little extra zoom and that is where the telephoto lenses come into play. A good companion to say an 18-55mm kit lens would be something like a 70-200mm or a 70-300mm, this way you're not missing much range between the upper end of your 18-55mm and the lower end of your telephoto. If you find a good deal on a lens that will leave you with a gap don't rule it out though, it just means you'll have to keep this in mind when shooting and you may have to move back a little to get the same composition in your shot.

Depending on your camera manufacturer you might be able to find older lens used for a fraction of the cost of a new lens. For example Canon's EF lenses will work on their dSLRs but due to the fact most dSLR's have a smaller sensor the magnification factor will be larger and I'll explain this below in a bit. When in doubt call your local camera shop (Don's or Phase II for example) before purchasing a used lens to make sure it will work with your camera and if possible try it out on your camera first to make sure it fits and the auto-focus is compatible.

A note on cropped sensors:

If you have a dSLR camera and paid less than $3000 for it chances are good that your camera's sensor is what's referred to as a “cropped sensor” or “crop sensor”. This goes back to the days of 35mm film cameras, the film was the part that “sensed” the light and was 35mm diagonally across. The sensors in consumer grade dSLR's are smaller than that of the 35mm frame hence the term “cropped sensor”. What this means is that if you find an older used lens that was made for a film camera the zoom rating will not be accurate anymore. For example if you put a Canon 100-300mm EF lens on a Canon Digital Rebel dSLR which uses a 1.6x crop sensor your effective zoom will actually be 160mm-480mm.

1.3x – Canon EOS 1D/1D MkII
1.5x – Nikon D40/D50/D70/D70s/D80/D200/D2XD2Hs Minolta 7D/Fuji S3 Pro Pentax *istDS/K100D/K110D/K10D
1.6x – Canon EOS 300D/400D/20D/30D

Here's a nice little reference table of standard zoom sizes and their effective zoom's on a crop sensor.

Full Frame 1.3 Crop 1.5 Crop 1.6 Crop

Don't let any of this dissuade you from saving some cash by picking up an older telephoto though as there is another advantage besides the extra zoom. All lenses suffer from some inaccuracies due to how the lenses are ground and what materials they are made from etc, this results in the center of the lens being sharper than the outer edges of it. When you put one of these older lenses on a crop sensor camera you dramatically improve the quality of the image because the sensor only uses the central portion of the lens thus discarding most of the area that is degraded.


As mentioned previously if you plan on shooting with a zoom lens you should really consider using a tripod, at higher zoom ranges any vibration or shakiness is multiplied dramatically and will result in blurry images.

One last thing to note is that when buying any lenses you typically pay a lot more if you want a larger aperture (aka a faster lens). Where a 70-300mm F5.6 lens may cost $250 the same lens capable of f2.0 may run in the thousands.

Prime Lenses

Before the days of variable zoom lenses they were all fixed zoom aka prime lenses. Why would anyone even consider a lens so limiting? Below are 3 very good reasons:

1. Image quality
Variable zoom lenses are made up of many more elements than a fixed prime lens, this means any errors in how each of these elements are ground will add up and therefore decrease the total optical quality of the lens. Due to this fixed lenses tend to be sharper across the entire image, not just the center. Other optical issues like barrel distortion, pincushion distortion, and chromatic aberration are reduced in prime lenses.

2. Speed
This term may be new to you but when someone refers to a lens as being “fast” they mean it takes in a lot of light allowing you to use a faster shutter speed. Due to how they are made they often are available with very wide apertures (1.2, 1.4, 1.8 etc) compared to the variable lenses. Why is this important? Photographers always run into the same problem: not having enough light. Say you're shooting indoors and want to avoid the use of a flash (at a wedding for example) and your camera tells you in order to get a proper exposure you need to shoot at 1/4h of a second at ISO 100 at f5.6. 1/4th of a second is going to result in a blurry shot even if you're using a tripod because the people will probably be moving a little. If you have an F1.4 prime lens available that would give you 4 more stops of light to play with letting you shoot at 1/60th of a second instead which is shoot-able handheld. In short it gives you options.

3. Shallow depth of field thanks to wider apertures

By using a very wide aperture (F1.4 or 1.8 etc) a very dreamy effect can be accomplished as backgrounds softly blur away allowing the viewer's eyes to be drawn to what matters.

So which focal length should you buy?

If you're going to pick up a prime lens I suggest going for a 50mm. The reason is that this is a very popular focal length for portraiture and therefore manufacturers make higher volumes resulting in lower prices. For both Canon and Nikon a 50mm prime can be found for under $150 and most likely other manufactures have similar prices to stay competitive.

Keep in mind though you may have to apply that multiplication factor to the focal length that we covered earlier in this article so your 50mm may end up working more like an 80mm if you're shooting a Canon. Don't get hung up on that though as generally “portrait” lenses are regarded as anything between 50-100mm.

Software Options

Here are a few options when it comes to image editing/library management. I highly recommend trying all of the free ones first as well as any trial downloads you can find before spending any cash at all.

Photoshop (CS4 is $1000, Elements Ver 8 is $129.99)

Now for image editing software Adobe Photoshop is the gold standard in the industry (CS4 is the current version), it’s the program that everyone uses. It is also ridiculously expensive which leads to a lot of pirating, there are tons of torrents available if that is the path you choose (I'm not condoning it). Another, more affordable option, is Adobe Photoshop Elements which is a "lite" version that sells for $129.99 as I write this at London Drugs. Check Adobe's website for downloadable trial versions before dropping any cash.

  • Pros: It is the industry standard bar none.

  • Cons: Pricey, A bit of a steep learning curve, I've used it for 8 years and am still learning new things every day.

GIMP (GNU Image Manipulation Program) FREE!

GIMP has been around for years now and has come a long way, it is by far one of the most full featured photography programs second only to Photoshop and maybe a few others. The best part is that since it started out in Linux the software is FREE. I recommend downloading simply because it is free and trying it out, chances are it will do everything you need it to do. Realistically the stuff that Photoshop has that GIMP lacks is more for advanced users anyway. There are parts of GIMP that aren't very user friendly or just outright backwards if you're used to Photoshop but the price kinda makes up for that ;)

  • Pros: Its FREE, full featured, and has an abundance of free tutorials and books online

  • Cons: Steep learning curve, not user friendly in some instances, awkward if you're used to Photoshop

Picasa a FREE program made by Google

I'm a huge fan of FREE and often recommend this program. It's no Photoshop when it comes to features but it is very user friendly and covers all the basics like cropping, resizing, exposure correction, and some nifty filters for spiffing up your photos. Picasa also acts as a photo manager for organizing your pics and has other handy features like "email" that will re-size your photo and automatically place them in a new email for you to send (supports outlook, gmail, and a few others). Personally I don't like the photomanager portion of it but that's just me.

  • Pros: It's FREE, covers most if not all of the “basics”, allows for fun projects like collages and slideshows

  • Cons: Due to its easy to use nature more serious photographers may not like the lack of complete control.

Adobe Lightroom ($369.95)

It takes its name from the film days where photographer's would view their negatives on a light table etc. Essentially it is a workflow tool for organizing your photos and is also a feature rich "digital darkroom". It gives you a plethora of controls for developing your photos and most "pros" use this to import & tweak their images before editing them in Photoshop. This isn't really a tool for beginners but if you're shooting in RAW already you might want to look into it.

  • Pros: Its fast becoming the industry standard for workflow and photo management, offers finer development control and Photoshop, great for processing RAW files

  • Cons: Price, Semi-steep learning curve, really meant for serious photographers


Tuesday, August 11, 2009

Digital Adventures In Infrared

IR Test (River Pano 50%)
Test image taken with my Canon G10 using an 850nm IR filter, coloured in PS during post.

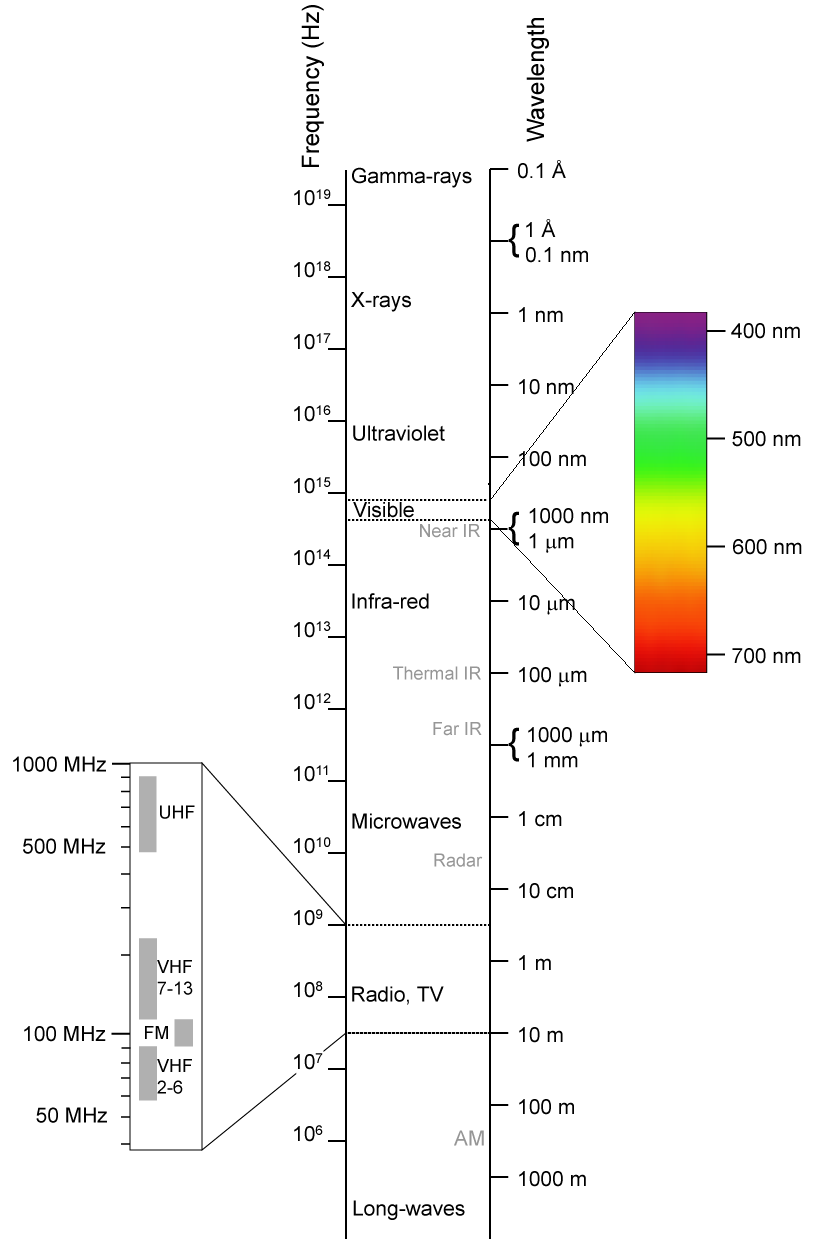
Infrared photography has always intrigued me, there is something about white trees and dark skies that brings a surreal nature to the images. With the dawn of digital cameras came the apparent dusk of IR photography, IR blocking filters that are installed on the sensors almost rule out IR photography entirely. There are still a few methods left and that is what this post is about.

The IR blocking filters, sometimes referred to as "hot mirrors" apparently are not all created equal. Here is a website that lists various camera's sensitivity to the infrared spectrum, unfortunately it appears to be a little dated but you can see the variance between cameras.

One quick way to see how sensitive your camera is to IR is to point your TV remote at the lens and see if you can see the IR LED light up when you press buttons on your remote. This is only the first step however, even if you see some light it still may not be sensitive enough but its a good start!

Assuming your camera has some sensitivity to the IR spectrum you can try what I did, purchase an IR pass filter for your camera. This filter blocks the visible spectrum and lets the IR light in. Filters are available in various wavelengths, in my case I used an 850nm IR pass filter.


Since we're blocking out quite a bit of the spectrum with the IR pass filter and since our internal filter is blocking a lot of the IR our exposure times will suffer. The image at the top of this article took 4 seconds at F2.8 with an ISO of 200 in the midday sun. Other cameras and filter combinations may yield different results but you should bank on having to bring a tripod, hand holding is simply not an option.

Another, more dramatic option, exists to enable your camera to take IR photos. There are companies which will take your camera and remove the IR filter or hot mirror from the digital sensor. This method has its pros and cons, it will reduce your exposure times greatly but can also limit your camera to only being able to take IR photos. It has also been noted that most cameras will have problems with their auto focus mechanisms due to the change in thickness of the filter over the sensor. Personally I'm not that big an enthusiast that I'll be sending in my 5DMKII any time soon.

Bez Infrared Cropped small
IR image faked in Photoshop

If you don't like either of these options you can always try to fake it using an image editing program like Photoshop or Gimp etc. While the results vary as much as the methods and the fact that it can be very time intensive it can yield some interesting images and give you another avenue if other options are not possible.

My Gear
I've been buying more and more stuff from this great Hong Kong based site, the other day I read an article that claimed people had success using IR filters on their G10 by use of a special adapter. I quickly checked out my Hong Kong connection and sure enough I found a 58mm filter adapter for $8 and a cheap IR filter for $19. So for approx $30 I was willing to take a gamble and it appears to have paid off!

Good luck!

Sunday, June 28, 2009

Simple way to digitize slides

Old Slide Digitized Using A Canon 5DMKII DSLR

Growing up it was always fun when my Dad would break out his big box of old slides and show them when we had company over. Years have passed since the last time that happened and with my parent's 50th wedding anniversary around the corner I starting thinking about digitizing them for a DVD slide show. To my surprise (and horror lol) I found that my father has 1200 slides in total, much too many to scan one at a time in a flatbed scanner. After asking one of the local photo stores about the costs of bulk scanning slides and finding this was relatively costly I decided to try and find an alternative.

The answer, it ended up, was laying in my camera bag. The simplest solution is to just set up the projector and screen and take photos of the screen. The results will not be as high quality as scanning them but for viewing on a TV and making 4x6 prints the quality is acceptable.

*Note: I've since viewed the images on my 46" HDTV using my PS3 and the results don't look that different from watching them on the projector screen itself ;)

What you'll need:
1) Tripod - This is a must
2) Cable Release - While not absolutely necessary it can reduce camera shake and result in a clearer picture
3) A camera capable of long shutter speeds (even most point and shoot cameras allow this now)
4) Projector, Slides, and a Screen
5) A darkened room

Things to keep in mind:
This will be a little advanced so most camera's "auto" or "program" modes aren't going to cut it or will need some tweaking, you're probably going to have to dust off your camera's manual and give it a good read. Because we're shooting in low light you'd normally want to use a high ISO setting, however that degrades the quality of the image, since the subject isn't moving we can use a long shutter speed instead allowing us to keep our ISO low to preserve quality. Also you should try to limit any changes in camera position or projector position shot to shot, this will help you later if you have a means of automating your post production (via Lightroom or Photoshop).

Tips for point and shoot cameras:

  • Set your camera to the lowest ISO setting available (normally 80 or 100)
  • Turn your camera flash OFF
  • Use the self-timer function on your camera if you don't have a cable release, this will ensure your camera doesn't shake when the photo is taken. Some cameras have a 2sec setting as well as a 10sec setting, this is essentially the type of thing that the 2 sec setting is meant for.
  • If your camera allows for exposure adjustment (usually indicated by EV±) you can use this to tweak the exposure brighter or darker, use trial and error to get it right.
  • Limit the amount of zoom you use, the more zoomed in you are the more amplified any camera shake will be.

Tips for DSLR cameras:

  • Set the camera to the lowest ISO
  • Use an aperture that is big enough to let in a decent amount of light but small enough to ensure a depth-of-field wide enough so your image is still sharp and in focus.
  • Use a cable release or self timer to limit camera shake, also if your camera allows mirror lockup you should enable that to further reduce shake.
  • Limit the amount of zoom you use, the more zoomed in you are the more amplified any camera shake will be.
  • Adjust your shutter speed to control overall exposure, again this will probably be trial and error.
Tips for post production work:
The first 100 slides I did manually one at a time, cropping them and then adjusting colour levels to correct for the colour shift over the years. I quickly realized that this was very time consuming and was defeating the point which was to get a "quick and dirty" copy of the slides while maintaining an acceptable level of quality.

A program such as Adobe Lightroom allows you to copy and paste develop settings from one picture to others. Basically you spend the time doing it right on one picture and then you highlight the rest and apply the same settings. You'll have to do this twice though, once for portrait orientation photos and then again for landscape orientation. Instead of spending 2hrs on 100 slides I was able to process 500 slides in 1hr. You'll still have to go in to manually fix a few of them if the colour correction or levels are funky but its a great time saver.

The same (or better) results can also be achieved with photoshop by setting up custom actions and then running them as a batch, this method is more time intensive but will also allow you to correct for perspective distortion (not available in Lightroom) since your camera will be shooting up towards the screen instead of perfectly perpendicular to the screen.

Using this method I was able to capture 300 slides in a little over 1 hour (not including cropping them on the computer and correcting colour etc).

Have fun and good luck

Friday, April 17, 2009

DIY Ringflash for approx $20


I actually made this tutorial by taking stills from sketchup google's free 3d rendering program. Its very handy for designing projects like this, it lets you see how everything is going to fit together first. Hope you like it, I'll hopefully post some sample images soon.

Friday, April 10, 2009

Fakin' It - Polaroid Transfers That Actually Look Real

Example using border created in this tutorial.
Parchment texture overlayed*
*
You can download the border template here

Some of you may or may not know what polaroid transfers are. Those that have done actual transfers may scream blasphemy!!! while those who haven't may rejoice in finding a decent tutorial on how to replicate the effect.

A polaroid transfer is made when the normal development process of the polaroid is interrupted and the image is instead placed on a different medium (normally paper). Normally heat and pressure is applied to encourage the image to bond to the new medium. This is all what I'm told, I've never had the pleasure of actually doing this, unfortunately Polaroid announced that they are no longer going to be making film so I may never get the chance. Lucky for me (and you) there are still ways to keep the look alive through the modern wonders of photoshop.

I was recently working on a shoot where the editing was leading me down a path that made the photo look a little "grungy" and I thought a polaroid border would suit it well. I knew at one time there was some nice soul who had posted up a psd template that was an actual scan of a blank polaroid transfer so I started looking. After 2hrs and many stock photo sites that were selling exactly what I was looking for I decided photographer/graphic designer/photoshop fiend would I be if I simply purchased this file. Luckily I stumbed across a post that mentioned using ink and some watercolour paper, thats all I needed to read and I was off to find the box with my drawing stuff.

This process is quite simple, there are probably a multitude of ways to do this and I encourage you to tailor this process to your own style.

Materials

  • 1 or more sheets of watercolour paper - others may work but watercolour paper has a nice texture
  • Ink of some sort. I used fountain pen ink but you could probably use all sorts of other stuff like food colouring or maybe even fabric dye just make sure it is dark. Get creative. It doesn't have to be black, we can fix that in photoshop.
  • 1 or more popsicle sticks - again other stuff could work, just get someting with a flat edge that you can use to transfer the ink.
  • Scanner - If you don't have one see if you can scan documents to file using the copier at work. If all else fails I don't think Office Depot or Staples charge that much for this service.
  • Image editing software that supports layers. Photoshop is preferred but GIMP (which is free) will work too. This tutorial however will be citing photoshop tools/commands only.
Making The Raw Border

Step 1
Prepare your work surface. Lay down some newspaper so you don't get ink on your table. It may also be a good idea to wear some old clothes just incase you splatter yourself.

Step 2
Prepare your palette. Just like an artist has a palette we need one too, something to put the ink onto. Use a separate piece of paper or an old margerine container lid, the margerine lid is better since it won't soak up the ink on you. Spread the ink out in a line on your makeshift palette.

Step 3
Run the edge of your popsicle stick lengthwise along the line of ink so that the whole edge is saturated.

Step 4
Place the ink onto your watercolour paper and gently rub it lengthwise back and forth while slowly pulling it towards you then slowly pushing it away from you. The idea is that as there is less ink it will start to leave voids and you'll get that "rough" look.

Step 5
Repeat for the remaining sides of your border. You may want to take another popsicle stick and break 1/3 of it off to use the remaining 2/3 section for the short sides of your border, this will give you a proper aspect ratio for your border. When I did it I wasn't that fussy, I knew I could correct the aspect ratio and more in photoshop. In the example below I didn't care that my "short sides" extended past the corners because I knew I would be erasing away the parts I didn't like.


Raw scan of a border.


Post Processing

Step 1
Scan your raw border(s) at as high a dpi as you can, if you're taking the time to do this right you'll want quality borders that you can use with future cameras that may be higher resolutions.

Step 2
Open the scan in Photoshop. Perform any straigtening/rotating you may need to. If your ink wasn't black press shft-ctrl-U to turn it black and white, or you may want to see how it looks as is first.

Step 3
Cleaning up the image. Use the eraser tool and first select a large brush with a hard edge, then start erasing away the unwanted areas. You may want to try one of the brushes that looks like spraypaint, this will give you a more irregular shape.Border cleaned up using eraser tool

Step 4
Crop the image down to get rid of the excess white border (the border around our border ;)
How much you crop is up to you, maybe you only want the inner border left or maybe not. Its up to you.
Border Cleaned & Cropped

Step 5
We now need to see how this is going to look. Duplicate your layer and name it "Polaroid Border Black". Set the blend mode to "Multiply". Then select your old background and delete the contents leaving a blank layer (click on background layer, then CTR-A, then delete). Now fill that layer in with a beige colour just so we can see how our blending will work.
You should now have something like this

Step 6
Some people might stop here and you're welcome to if you'd like however I want to add a little more realism to the border. If you're with me, click on the Polaroid Border Black Layer and duplicate it, name it Polaroid Border White.

Step 7
Invert the colors of the new border by holding Ctr then "i", now change the layer blending mode to "Screen". Don't worry it's going to look a little strange at this point.

Step 8
With the "white" layer still selected press Ctr-A to selecte the entire canvas, then under the edit menu at the top of the screen choose Transform>Rotate 180°

Step 9
This looks better but the layer order is wrong. Drag the "Polaroid Border White" layer between the black border and the background layer.
This is what you should now have roughly

Step 10
At this point the border is pretty much finished, if you want you can erase away different sections of the layers to "tweak" it a little more and you can play with opacity. When I do this I like to have an actual image under the frame so I can see what to tweak. Once the adjustments are done save this as a PSD file so that you can always change the different layers if you want to.


Using The Border

Step 1
Open up an image that you want to apply the border to and note the dimensions. For this example I'm using the full resolution of my Canon 40D which is 3888x2592.

Step 2
Now we're going to try to match your border to the image size your camera takes, however we want to make it just a little bigger so that the border isn't encroaching on your photo too much.
Open your Polaroid transfer border and select Image Size front he Image menu at the top of the screen. Determining the right size is tricky and may take a few attempts, start with your the dimensions from step 1 then add an extra 10% to the width and about 6% to the height. Make sure you uncheck "Constrain Proportions" box. Paste your camera image into the border and make sure the border overlaps it but that the image doesn't extend past the border. If it doesn't just "undo" back to the re size and try again. For me a good number worked out to be roughly 4120x2860 which is where I got the 10% and 6% from. Once you have it right, delete the image layer leaving only the borders and the background, change the background colour back to white, and save it as a psd file.

Step 3
Now you're ready to use it with any photo however every time you use it you will have to paste your desired image into the Polaroid frame. Make sure when you paste the photo in that you move the layer so that it is just above the background layer.
Here "Layer 1" is the photo placed correctly in the layer orders.

Step 4
Once you have it lined up right choose the SAVE AS command to save so that you don't overwrite your template file.


Troubleshooting
There are 2 main things that can go wrong, both are easily fixed.

1) Your black border is too transparent even though the opacity is set to 100. If this happened its because your ink wasn't dark enough, to fix this select the black border layer and press Ctr-L to bring up the levels tool. Adjust the black slider to bring it up to a true black.

2) Your photo extends past your border but only in a few spots. Easy, just erase it away.

** The example at the top follows all the steps to the end with the added step of using additional layer containing stained parchment. This is a texture layer that was blended using multiply, opacity set to 50, and masked off to avoid contaminating the model's skin.

Tuesday, February 3, 2009

Photography 101 - An introduction to light

Everything you need to know about shutter speeds, aperture, and ISO.

*All images contained in this document are either being used under a creative commons license or are the author's own work.

(Link to pdf version of this document)

Preface:

Before we start lets look at the word “Photograph”. The word was originally coined by Sir John Herschel and won out over “photogene” and “heliograph”. All of three words have Greek origins meaning light, photo or phos and helios. Immediately you should see how relevant understanding light is since it’s built into the word photography. We’re graphing light here!

The goal of this article is to explain a little about how light works and how the various features of your camera control it to produce an image. Ideally you'll need a camera that lets you control these settings but even if your camera doesn't allow you to just understanding how these work will still help you greatly.

The three main controls you have over light are the time or the duration your film is exposed to light, the amount of light by changing the size of the hole, and the film’s sensitivity to light. Shutter speed. Aperture size. ISO. 1-2-3.

Shutter speed, aperture, and ISO all play different parts in contributing to your overall exposure as well as having special properties of their own. We’ll look at them individually and then see how they work together.


Chapter 1: ISO with relation to exposure


ISO (formally ASA)


Regardless of what is inside your camera you’re still trying to capture light, film and digital sensors both accomplish this. With film it is tiny crystals that are sensitive to light (silver halide salts bonded with gelatin), digital sensors have similar things called “photosites” and these too are sensitive to light.


Either way you need a certain amount of light to make an image show up, the amount of light depends on how sensitive the film is to light. This is where the ISO number comes in. The ISO rating for film, carried over to the digital realm, is a means of expressing the sensitivity to light. The higher the number the more sensitive to light the film is. For example a film with ISO 400 will need half as much light as ISO200 would need to get the same exposure. You’ll also notice that ISO tends to work in multiples starting at ISO 50, then 100, 200, 400, 800 and so on.

Imagine if you will a tap that will represent shutter and aperture, and a glass that when full is the proper exposure. The water itself is light. ISO would represent the size of the glass that needs filling. The more sensitive to light the higher the ISO and the less light is needed resulting in a smaller glass to fill.


There is a trade off however between ISO and image quality, if there wasn’t then we’d always want the high ISO and never use the lower one. In order to make the film more sensitive to light the crystals that are used are much larger (more room for the photons to hit), it is similar in digital sensors but more complicated to explain. By using larger crystals the resulting image will appear coarser or grainier and the same effect occurs with digital. The higher the ISO the coarser your image will look, once you understand the rest about shutter speed and aperture you’ll be able to determine what ISO you’ll need for whatever shooting conditions you are in.


Low ISO sharp image ----High ISO grainy image

You’ll almost always want to keep the ISO as low as you can to get the sharpest photo. That being said, sometimes using a higher ISO can make the image “grittier” and add to the feeling of the image. For example if you’re taking a portrait of a woman and want to imply smoothness and femininity you’d probably want to shoot as low an ISO as possible. If you’re shooting the weather beaten face of a prairie farmer who is tough and hearty you might accentuate those qualities by using an higher ISO for more grain.


Chapter 2: Shutter Speed and Aperture regarding exposure.


Both of these controls work hand in hand, it is hard to explain one without explaining the other. To help explain these we’ll go back to water as an analogy for light.


Imagine again an empty glass representing an unexposed frame, when it filled to the brim means a proper exposure. The time that the shutter is held open is represented by how long we leave the tap on, the size of the tap is representing the aperture.

To show you the two extremes we could fill the glass up very quickly or very slowly. If we had a tap that was very small we’d have to leave it on for a long time to fill the glass up, or we could have a really big tap and only turn it on for a short period of time.


If we use a big tap and leave it on too long the water will spill over the edge of the cups, or in other words a large aperture and long shutter speed will result in an over exposure. Conversely a small tap not left on long enough won’t fill the cup, a fast shutter speed and a small aperture will result in underexposure.

As was stated previously this example shows the extremes, either control can be varied to compensate for the other. Often you'll need to vary your aperture to allow you to shoot at a safe shutter speed to avoid blurry photos. Generally 1/60th is considered safe to shoot hand held, slower and you should use a tripod.

Here are some examples, if we were taking a picture of something that is happening quickly we’d want to use a fast shutter speed, or in the case of the water analogy a quick on/off of the tap. Because we’re only turning the tap on for a short duration we’ll have to increase the tap size or “aperture” if we still want to fill the glass.

Let’s break away for a second to explain a little more about aperture. The size of the aperture is measured in F-Stops. It’s a little counter-intuitive because the larger the F number the smaller hole or aperture. It might help to think of it as how much light the aperture “stops”, the higher number means its stopping more light. These numbers are setup in fixed increments and depending on your lens you may not have exactly the same numbers.


With regards to getting the proper exposure (ie filling the glass exactly to the top) both of these controls are proportional to each other.

If we took a photo with a shutter speed of 1/1000th of a second at F8 the exposure would be the same as taking a photo at 1/500th of a second at F16. Since we doubled the time of the exposure (time the tap was on) we had to halve the size of the hole (size of the tap) in order to get the same amount of “water into the glass” or light into the camera. We'll explore the relationship more in chapter 4.

Chapter 3: The other properties of the 3 controls.

ISO

Ok so we've sort of already covered most of this one during the explanation of what ISO is. The special property of ISO, outside of how it affects exposure, is the fact that it will change how your image looks depending on the “grain size”. High ISO images will be coarser and grainier than low ISO images; you'll have to weigh the pros and cons when shooting. Some digital camera's noise is very much like that of film and can look nice in certain shots, other cameras the noise will just take away from the image completely. Some cameras handle noise better than others. A shot at ISO800 using one camera may look like it has less noise than an ISO200 shot from a different camera. Not all cameras are created equal, the point and shoot variety tend to suffer the most with high ISO noise and should normally be kept under ISO 400 if at all possible.

Shutter

How the shutter effects exposure is pretty straight forward, it is like a valve that turns on for specific duration of time letting light into the camera. The special property aside from exposure though is the ability to freeze or expand time. A fast enough shutter speed can stop a bullet in mid air or stop the beating wings of a humming bird. A slow shutter speed can drag out an instant and show motion. There are many ways to use this to your advantage to completely change the mood of a shot.


Left. By allowing the shutter to remain open for several seconds the headlights of a car can be seen continuing on as the vehicle moves past leaving a light trail.

Right. Using a very fast shutter speed of 1/8000th you can make out the individual droplets of water formed by the jets in a water fountain.

Aperture

As we saw previously, aperture is basically the size of the end of our faucet or the opening to our camera. The bigger it is the more water flows out or the more light that gets let into the camera. Aperture has not one but two special properties, both have to do with what is called “depth of field” or “DOF”.

With a small aperture (high F#) you can have a very large DOF meaning that everything in the depth of field will be relatively in focus. A large aperture on the other hand will of course do the opposite, only a shallow distance will be in focus.


Left. This image is using a very small aperture so that the DOF is huge stretching all the way across the riverbank so that both the foreground and background are in focus.

Right. The opposite is true for a large aperture, the DOF is very shallow and only extends a few inches in front of and behind the flower.

Think of depth of field as a flat plane that has a thickness, as you close your aperture making it smaller the DOF gets deeper or thicker. Everything that is the same distance or “depth” from you will be in the same DOF.

Here's a little more information on the topic. If the opening or aperture is small then there is very little variance allowed in the path of light through the aperture. As seen in the image below if the line varied up or down it wouldn't make it through the hole, this results in a sharp image. With a hole small enough you wouldn't actually need a lens to focus, this is the principle behind pinhole cameras. Pinhole cameras have very high F#'s because the hole is so small, F stops of F150 and higher are common. In case you're wondering where the F# comes from it is the ratio of the focal length (distance from aperture to film surface) to the diameter of the aperture. So a 100mm lens set to F4 would have an aperture of 25mm (F#=ƒ/D). You don't need to know this but its interesting to understand the origins.


Tree in real life ------------- Tree as it appears in camera

Now if we open up the aperture as shown in the image below we will allow more variance in the path the light can take from a single point. This results in a blurry image.


The other special property of aperture is that the shape of the out of focus stuff can take on the shape of your aperture under certain circumstances.


In this photograph a person covered their lens with construction paper that had a star shaped hole on the front. They then made the image out of focus intentionally. In this instance the star shaped hole acted as an aperture and allowed the out of focus light to take on the shape.

Another place you'll notice this is if you take a picture of bright lights at night or even the sun, the glare will often form a 6 point star pattern. This is because a lot of apertures use a 6 blade configuration that form a hexagonal hole.


In case you're wondering if the “out of focus stuff” has a name it does, well sort of. Somewhere along the lines someone started calling it “Bokeh” pronounced Bo-Kuh. The word is derived from the Japanese noun “Boke” meaning blurry or fuzzy.


Chapter 4 – Putting it all together

By now you know that each of the 3 controls influence exposure, but with all the variables its a little hard to keep track of them. Lucky for us a few people have been nice enough to make this easier on us so we don't have to do the math in our heads. Michael from Imageguy has made a quick reference card to use if you need to adjust your settings while keeping the exposure the same. If I fail to explain it well here you can watch a video over at http://www.imageguy.com/exposureadjustment-chart/

They also have a dowloadable PDF of it there that is much more suitable for printing.

To use this chart you will have to already know what settings will get you a proper exposure. If you have a digital SLR all you have to do is set your camera to auto, take a photo of what you plan to shoot, and then review the image information. Let’s say for this example your camera determines that 1/60th of a second at ISO200 with F8 is properly exposed. Unfortunately you want to take a photo of your kid playing baseball and you want to freeze time as he swings the bat. 1/60th of a second just isn't quick enough to capture that. Don’t fret just put your camera into manual mode and we'll use the chart to figure out what we need to do to shoot it at a quicker speed of say 1/500th of a second.

Start by counting the dots between 1/60th and 1/500th of a second. There are 3 dots and we're moving up, this means that we'll have to compensate either our aperture or ISO settings by 3 stops or a combination of the two. Remember since we're compensating for 3 stops up we need to go the other way on the other settings to reduce by 3 stops.

We could either reduce our aperture by 3 stops to F2.8, or we could increase our ISO to 1600, or a combination of the two. Since we learnt earlier that it is always a good idea to keep the ISO a bit lower let’s only go one stop to 400, and then we'll drop the aperture to F4. As you see we move the opposite direction on the lines we're using to compensate.

Another example, say we're shooting a flower up close but we want to blur out the background by having a shallow DOF. Lets say we know that we're getting a proper exposure at 1/125s with ISO 400 at F16. Because the aperture is so small our depth of field would be huge causing the background to remain in focus.

What settings would we want to use if we knew increasing the aperture size to F2.8 would give us a nice blurry background?

Count the dots, we're reducing the aperture by 5 F stops if we're going to drop from F16 to F2.8 so therefore we need to increase the other settings by 5 stops total.

I'd say that for flowers we're again going to want to reduce film grain, also the fact that we're doing a close up of a flower means we want as much detail as possible. This means we should start by changing the ISO from 400 to 100 which gives us 2 stops. We still need another 3 stops so lets increase our shutter speed from 1/125th to 1/1000th .

You see how this is working? It’s really not that hard at all.

Ok so this is great if you know the proper exposure but say you found an old film camera in your grandpa's basement and it doesn't have a built in light meter to do the work for you. There is a trick called the “Sunny 16 Rule” that is very easy to remember. If it is sunny outside set your camera to F16 then set your shutter speed to 1/ your ISO. For example if you were shooting ISO 200 you'd set your shutter to 1/200. Now you know the proper exposure and can compensate from there by counting stops to get to any combination of settings you need.


Chapter 5 – For those of you with Point and Shoot cameras

Ever notice how all these cameras, even DSLRs, have “program” modes like “Sports” “Indoor” “Outdoor” “Portrait” “Kids & Pets” etc ? Well since your camera never knows what type of subject you're shooting (yet anyways) they build in presets to at least give you a little control.

This may not be exactly what your camera does since each manufacturer has slightly different methods but this should be close. These presets will often also change other settings such as the colour and amount of sharpening, however for the purposes of this document I'll only address what affects exposure.

Sports. This will often raise your ISO and Aperture size to allow for a faster shutter speed, thus allowing you to freeze the action.

Indoor. Will do the same as sports but adjust to a shutter speed that is safe enough for a hand held shot not to be blurry. If this still isn't possible it will turn on the flash.

Outdoor. This will often lower your ISO and increase the aperture, since its bright outside you don't need the extra light sensitivity.

Portrait. Depending on your camera it may lower ISO to give you a cleaner image. Most often it just reduces the in-camera sharpening of the image so that it is softer, this doesn't affect exposure though.

Landscape. Often this will try to set a smaller aperture to allow for a greater depth of field. This setting will also normally enhance green and blue colours for more vivid skies and trees, again this does not effect exposure.

Kids & Pets. Both of these subjects tend to move fast and unpredictably, like the sports setting it will open up your aperture and increase your ISO to allow for a quick shutter speed.

All cameras are different, take the time to fool around with yours and see what it is doing. Now that you understand how the shutter, aperture, and ISO work you should be able to figure out what your camera is doing when you put it in one of these auto modes just by looking at the image information after you take the picture.

That's it for this edition, now stop reading and get out there and start shooting!